1Your branches
- 1.Go to People → Branches.
- 2.Each card is one branch, site or location: its address, how many people work there and its team leader (★).
- 3.The geofence (e.g. 300m) is how close staff must be to clock in.
- 4.Print the branch QR code — Download PDF sheet gives a ready-to-print poster — and put it up where staff arrive.
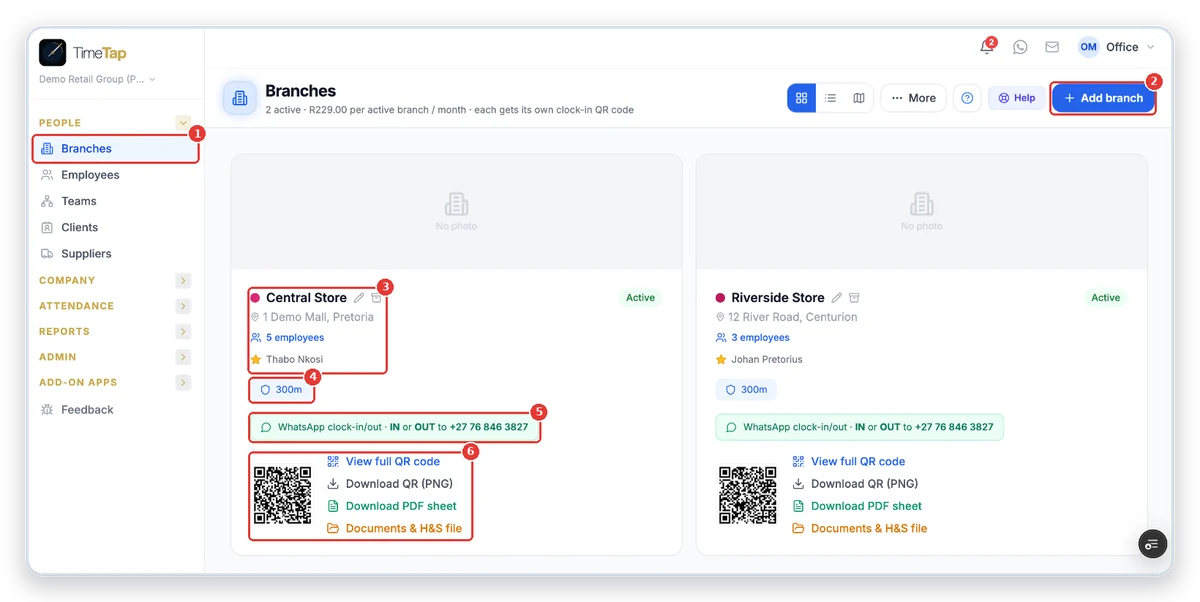
- 1Branches in the side menu.
- 2Add branch — a new branch, site or location.
- 3The branch: address, number of staff and its team leader (★).
- 4Geofence — how close staff must be to clock in.
- 5Clock in or out by WhatsApp: staff send IN or OUT.
- 6The branch QR code: view it, download it, or print the PDF sheet.
Tip: Documents & H&S file keeps the branch’s own documents (licences, health & safety) together.
2Add a branch
- 1.Click Add branch.
- 2.Choose Fixed site (office, shop, depot) or No fixed site (mobile or field teams).
- 3.Search the business or address and pick a suggestion, then drag the pin to the exact entrance.
- 4.Type the branch name. The Hours & attendance and Shifts tabs are optional — you can set them later.
- 5.Click Create branch / site.
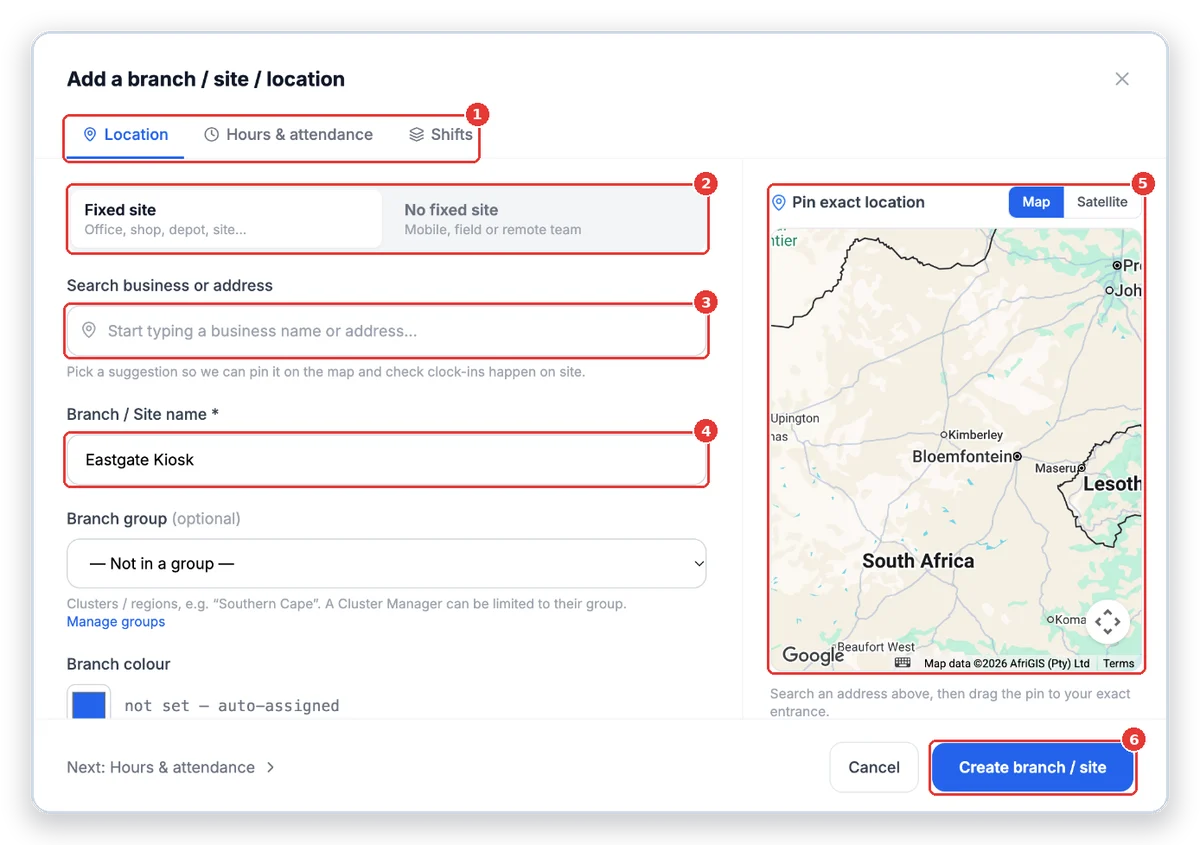
- 1Location, Hours & attendance and Shifts.
- 2Fixed site or no fixed site.
- 3Search the address — TimeTap checks clock-ins happen on site.
- 4The branch name.
- 5Pin the exact entrance on the map.
- 6Create it.
Important: Each active branch is on your monthly bill — the form shows the amount before you create it.
Need help?
Use the feedback button in the TimeTap side menu, or ask us — we’re happy to help you set it up.
More guides
Add employees
Add your staff, choose what they can do and send them the staff-app invite on WhatsApp.
Shifts & rosters
Set up your shift times once, then build the weekly roster. Staff see their shifts in the app and lateness is worked out from them.
Who’s in & timesheet review
See who is at work right now, then check each day’s clockings and approve the hours for payroll.
Approve leave
See every leave request, check the balance and history, and approve, reject or change it.
Service certificates
How TimeTap creates and sends a service certificate by itself when a job is completed — and how to get a certificate for a service done before you used TimeTap.
Screens shown are from a demo company — names and numbers are made up. Your TimeTap shows your own company.