Run generator servicing from schedule to invoice

TimeTap keeps every generator you look after on its service schedule, books the visit with the client, gives your technicians the service checklist on their phone, sends the service certificate and invoices the job — in one flow.

Screens below are real TimeTap screens from PowerOn Generator Services (a demo company) — names and numbers are made up.

The whole flow in 8 steps

  1. STEP 1

    Add the generator and link it to the client

    Office

  2. STEP 2

    Put the asset on a service schedule

    Office

  3. STEP 3

    Pending job cards are created for you

    TimeTap

  4. STEP 4

    Confirm the date with the client, then commit

    Office

  5. STEP 5

    The technician does the service on the staff app

    Technician

  6. STEP 6

    The certificate is created and sent

    TimeTap

  7. STEP 7

    Invoice the job

    Office

  8. STEP 8

    Every visit in the client's history

    Office

STEP 1 · OFFICE

Add the generator and link it to the client

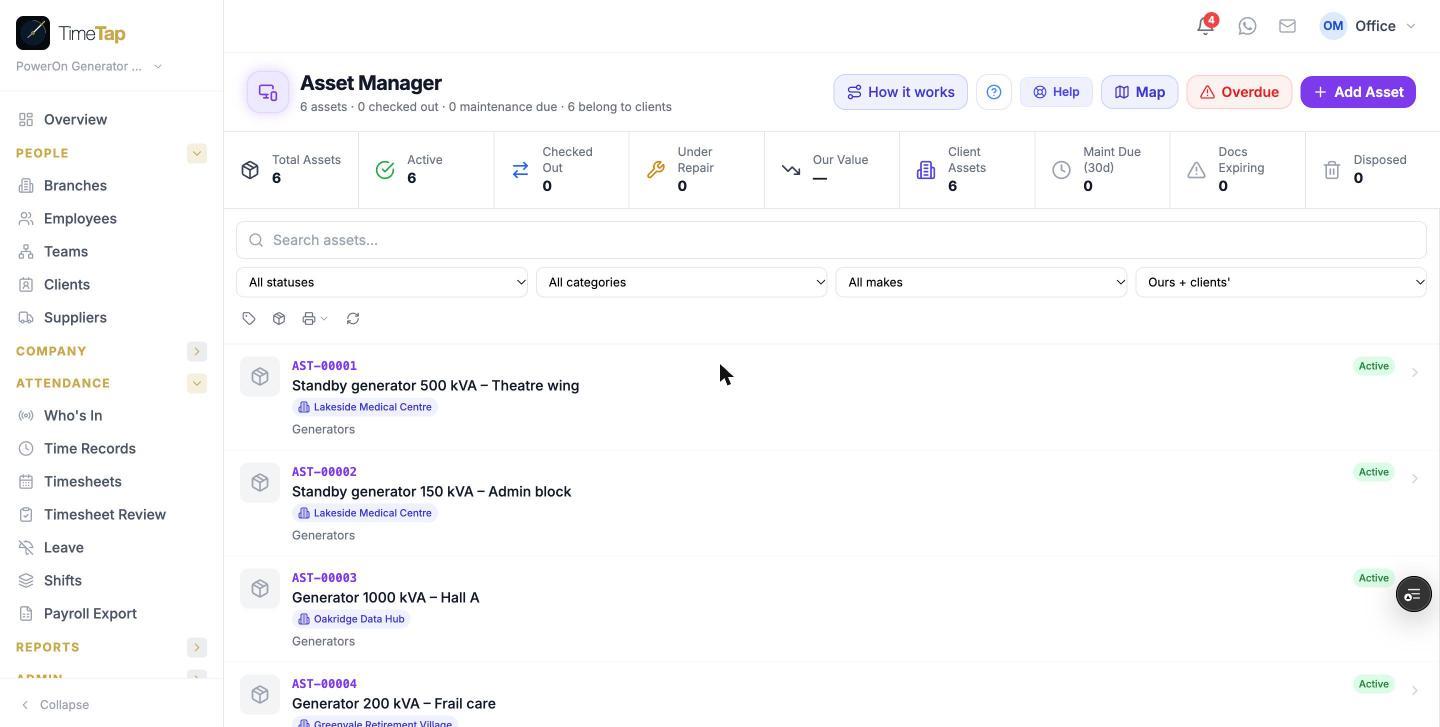
Where: Assets → Add Asset

Every generator you look after is an asset in TimeTap, linked to the client who owns it and to the address where it is installed. One generator = one asset — a site with three generators gets three assets.

  • Asset Name — what the technician will recognise on site.
  • Asset Type — choose Fixed / Building for an installed unit.
  • Linked Client — ties every job, checklist, certificate and invoice to that client.
  • Location Address — the exact installation address the technician drives to.
  • Category — optional; a category with a service interval gives a next-due date even before a schedule exists.
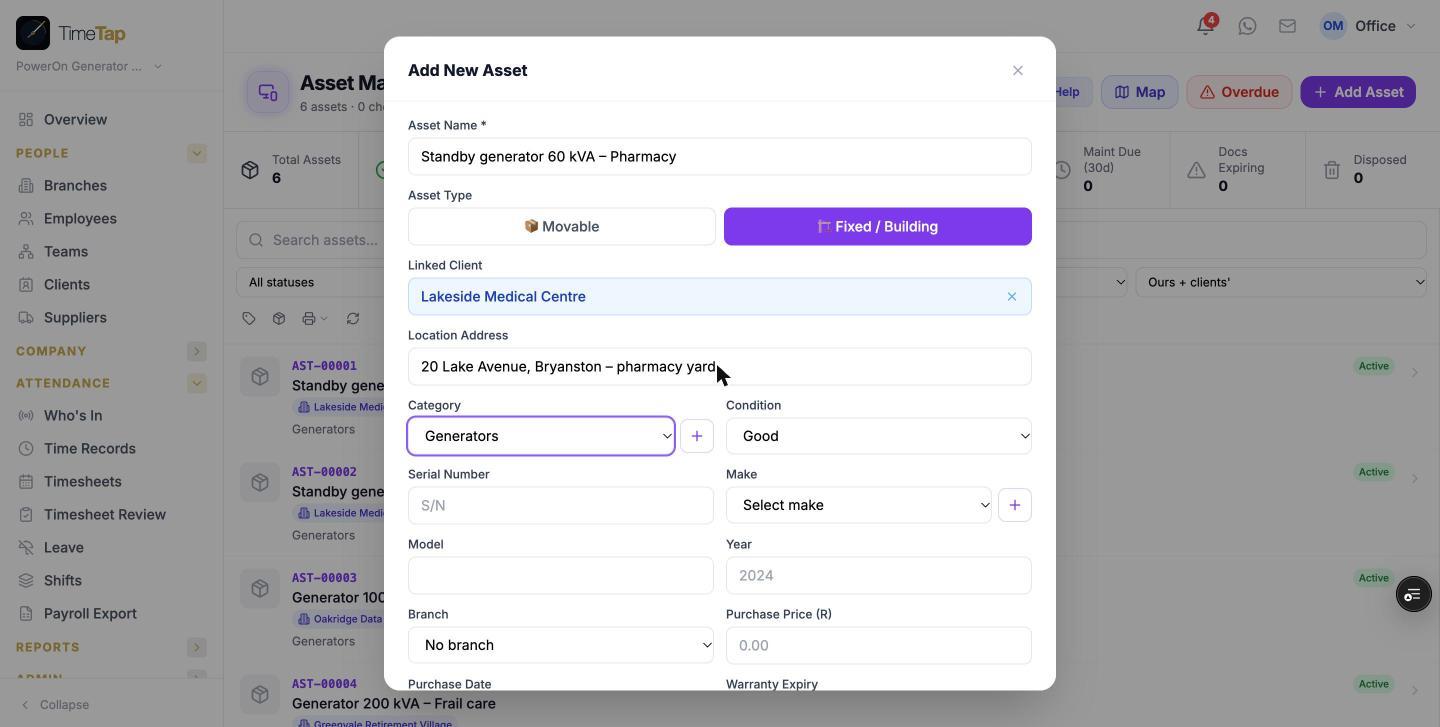
Adding a new asset, linked to the client and its installation address
The asset register: every unit, its client and its status

STEP 2 · OFFICE

Put the asset on a service schedule

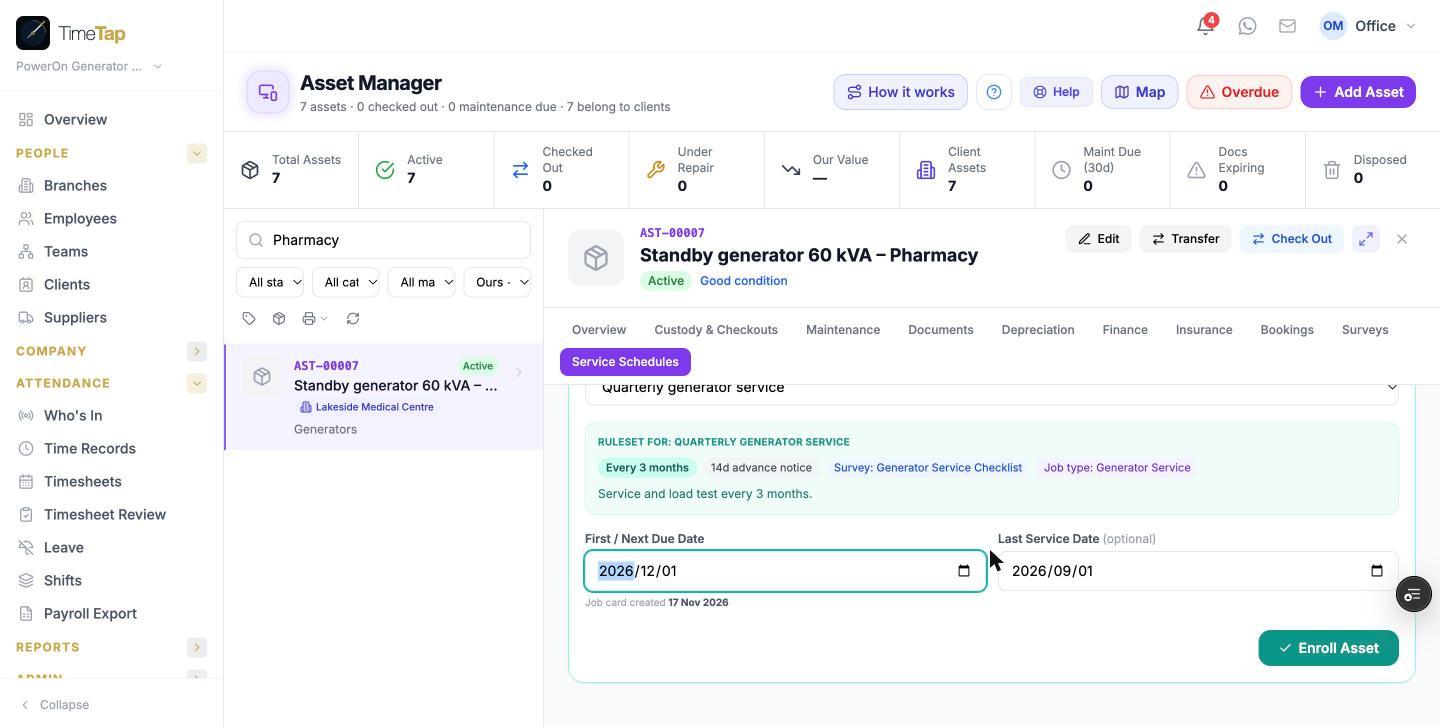
Where: Asset → Service Schedules → Enroll in Schedule

A schedule is what makes TimeTap create the job cards for you. Pick the schedule type (for example Quarterly generator service) — it brings the frequency, how many days ahead the job card is made, the checklist and the job type. Enter the first due date and, if you know it, the last service date.

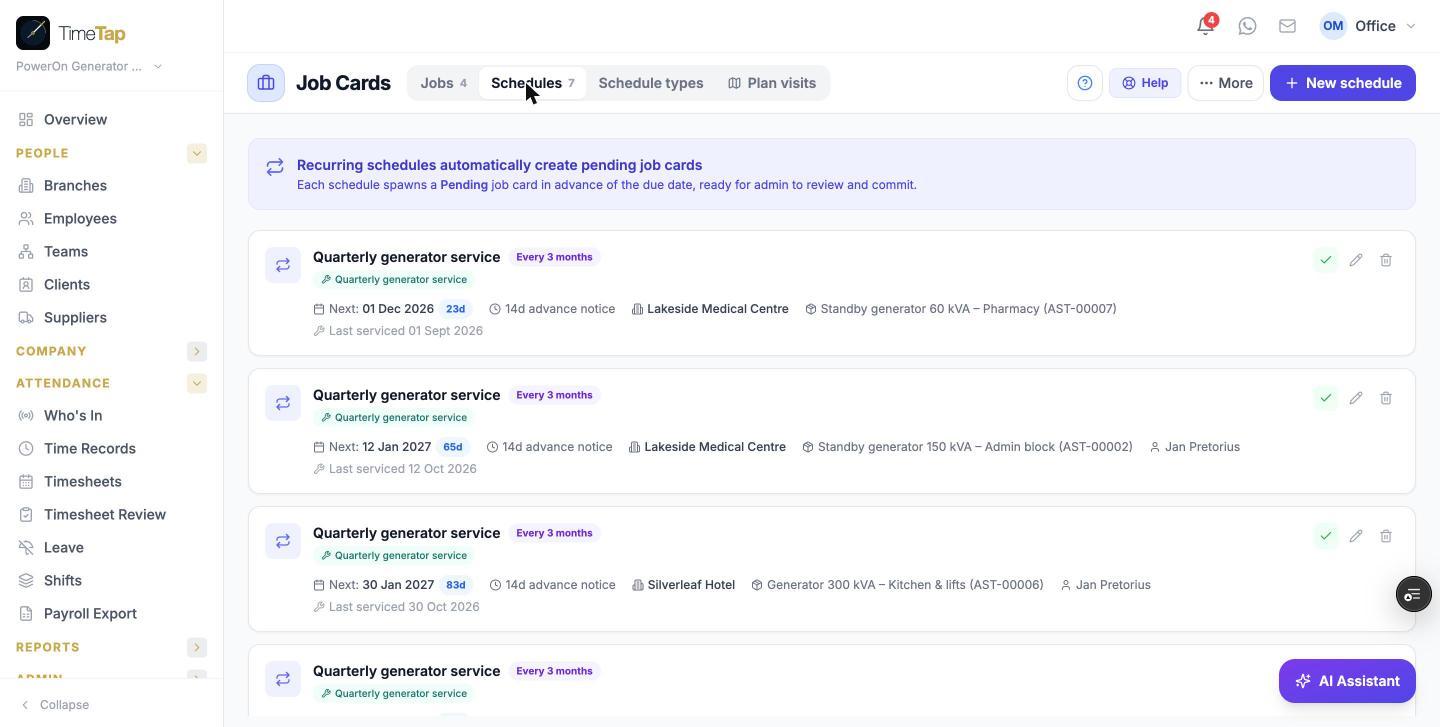
  • All schedules are also listed under Job Cards → Schedules, with the next due date, client, asset and technician.
Enrolling the asset in the quarterly generator service schedule — the ruleset shows what it brings
Job Cards → Schedules: every asset on a schedule, with its next due date

STEP 3 · TIMETAP

Pending job cards are created for you

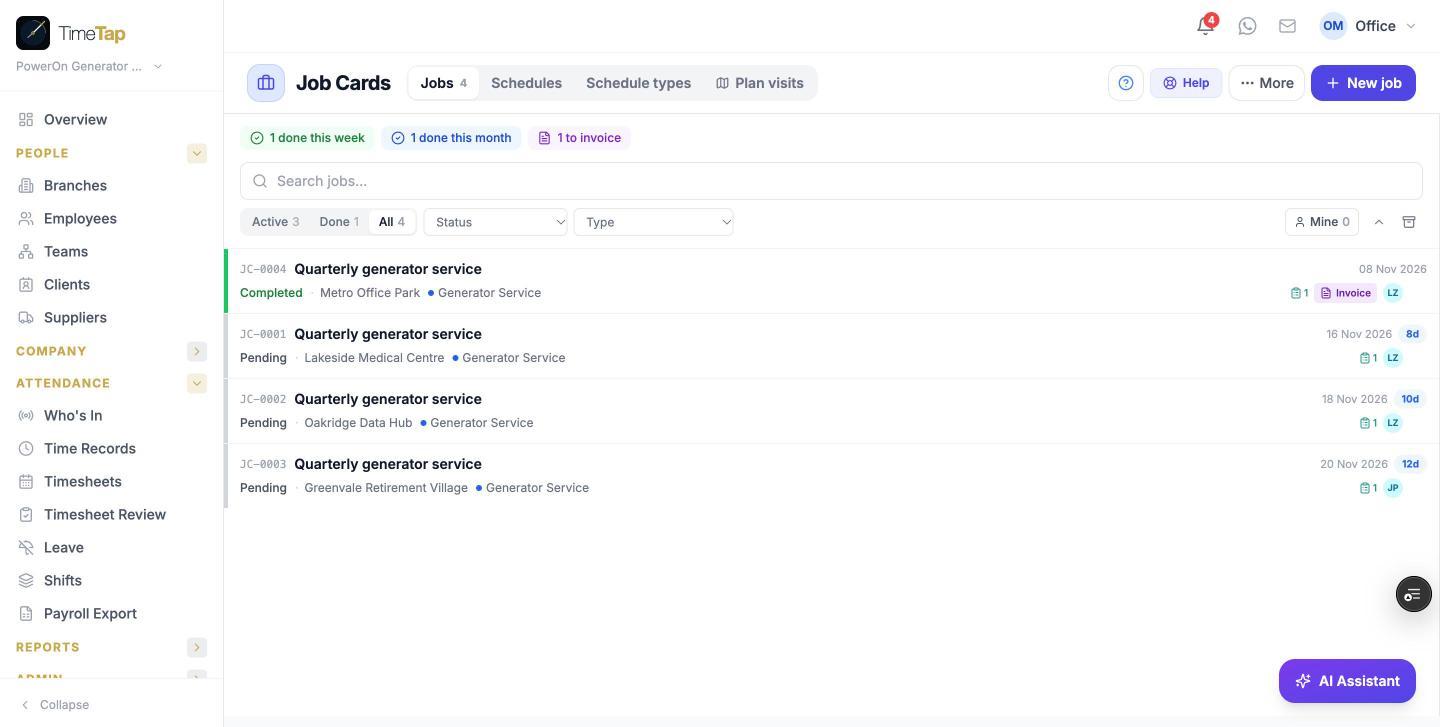
Where: Job Cards → Jobs

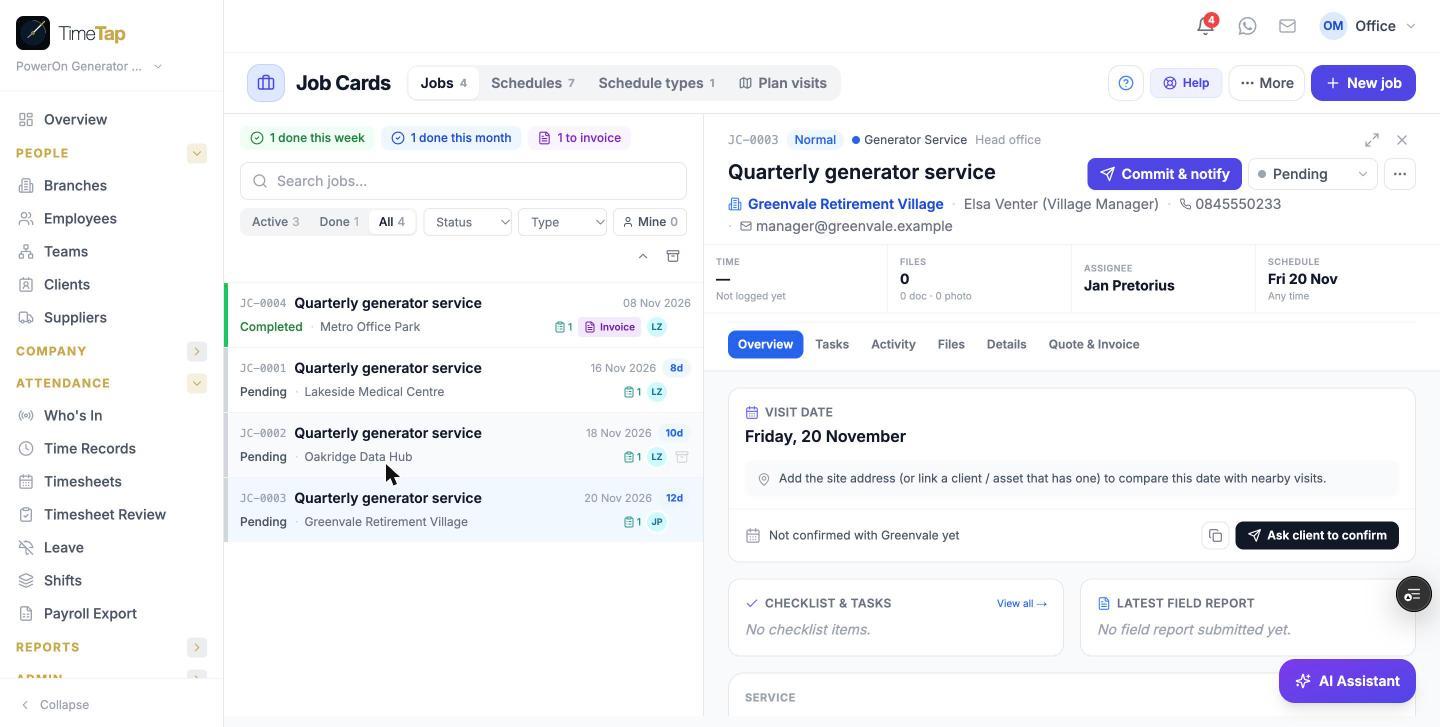
When a service comes due (14 days ahead by default), TimeTap creates a Pending job card with the client, asset, address, checklist and technician already filled in. Pending means the date is still a proposal — nobody has agreed to it yet.

  • Plan visits shows pending jobs close to each other, so one trip can cover several sites.
Pending job cards waiting for the office

STEP 4 · OFFICE

Confirm the date with the client, then commit

Where: Job card → Visit date

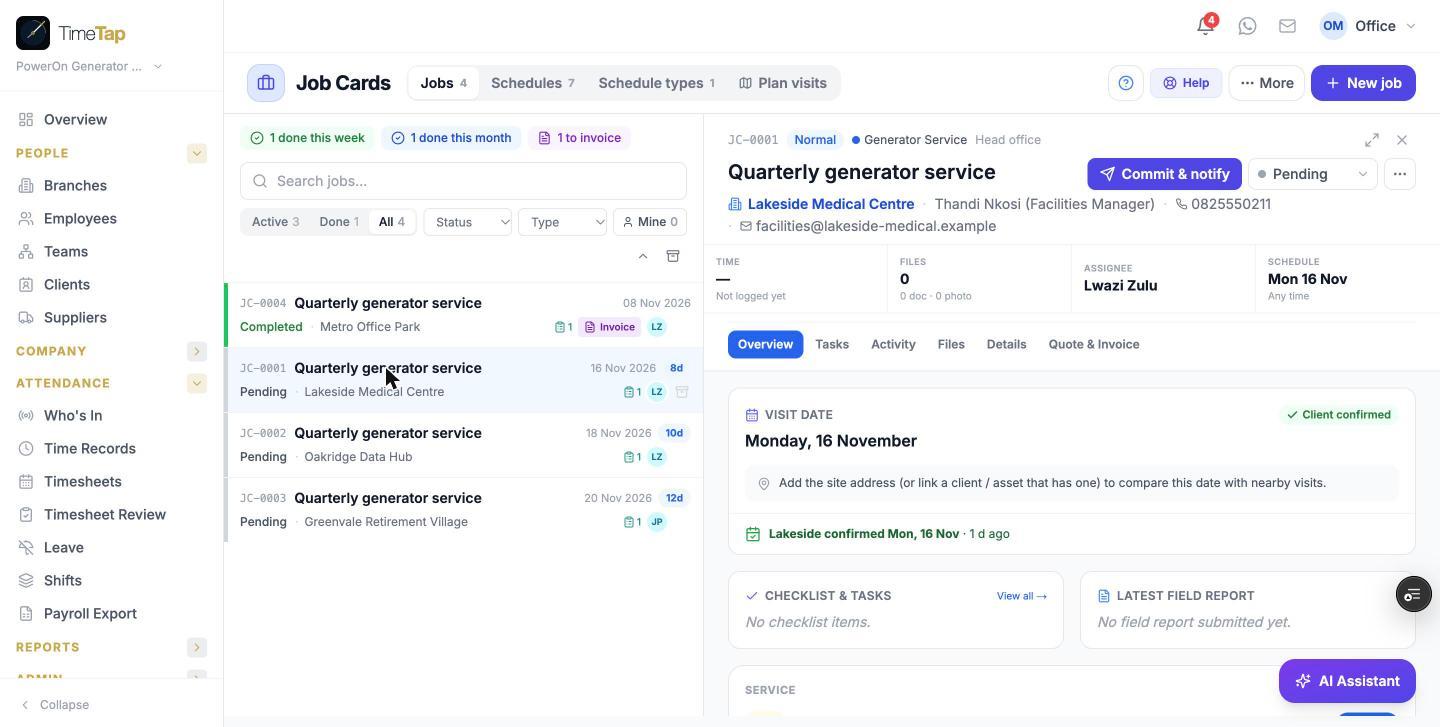
Open the pending job card. On the Visit date card, tap Ask client to confirm — the client gets a WhatsApp to accept the date or ask for another day. (This needs a cellphone number on the job, the contact person or the client.)

When the card shows Client confirmed, tap Commit & notify: the job is booked and the technician is notified on the staff app.

A pending job not yet confirmed — Ask client to confirm
The client confirmed — Commit & notify books the job

STEP 5 · TECHNICIAN

The technician does the service on the staff app

Where: Staff app → Jobs

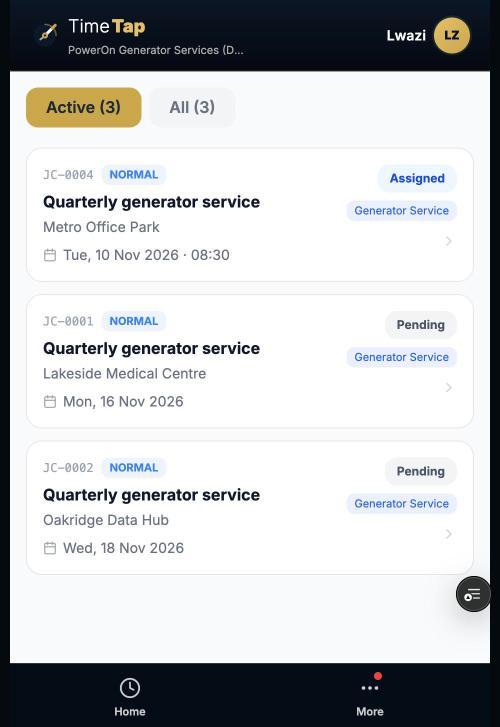
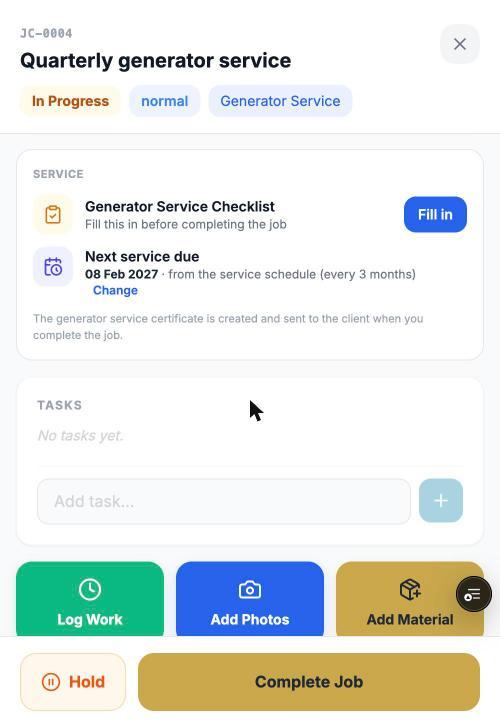
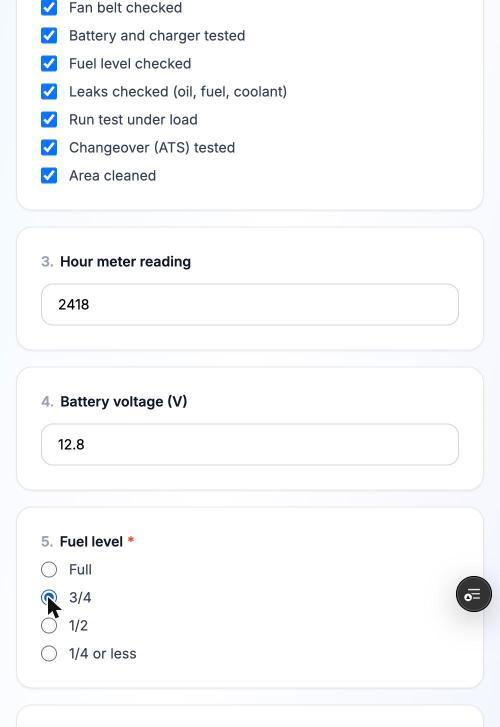
The technician opens the job on their phone, taps Start Job on site (the location is recorded) and fills in the Generator Service Checklist. The job cannot be completed until the checklist is filled in.

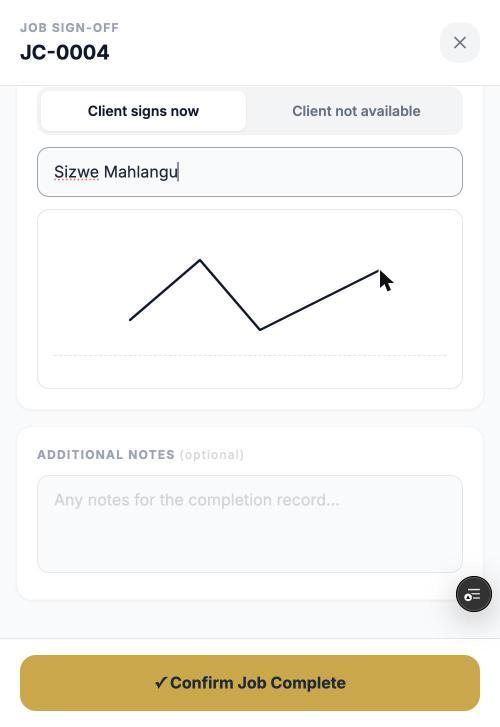
They finish with Complete Job: their signature and the client's signature on the phone (or a sign-off link if the client is not there).

  • Readings such as the hour meter and battery voltage are captured as numbers, so they can be compared visit after visit.
The technician's job list
The service card: checklist to fill in and the next service date
Filling in the Generator Service Checklist
Sign-off: technician and client sign on the phone

STEP 6 · TIMETAP

The certificate is created and sent

Where: Job card → Service

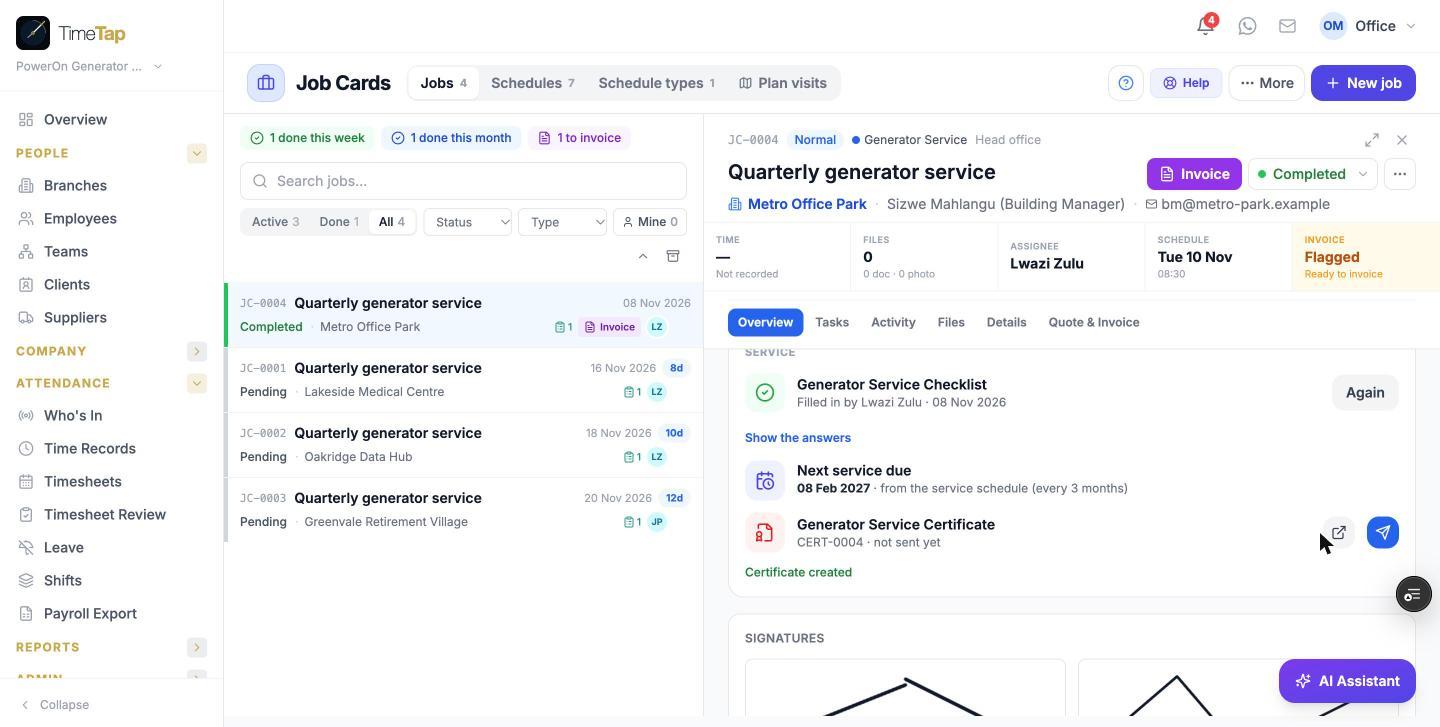
On completion TimeTap creates the Generator Service Certificate with the date serviced and the next service due (from the schedule), and sends it to the client by e-mail and WhatsApp — straight away, or only once the invoice is paid. It stays on the job, on the asset and in the client's history.

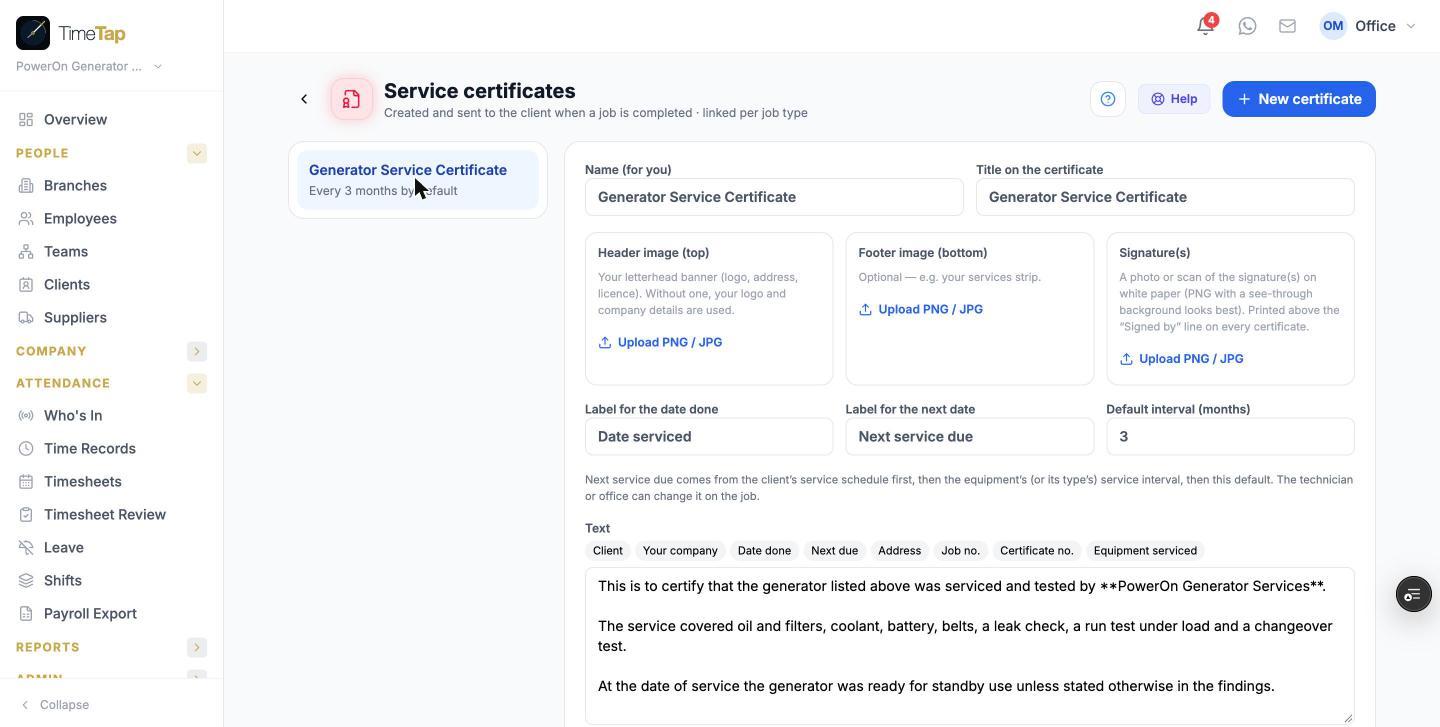
  • Set the certificate up once under Job Cards → Certificates: your letterhead, footer and a signature image (a PNG with a see-through background looks best).
  • Want to be paid first? Set When does the client get it? to Once the job's invoice is paid — the certificate is created on completion but only goes to the client when the invoice is paid.
The completed job: checklist, next service date and the certificate
Job Cards → Certificates: letterhead, footer and signature

STEP 7 · OFFICE

Invoice the job

Where: Job card → Quote & Invoice

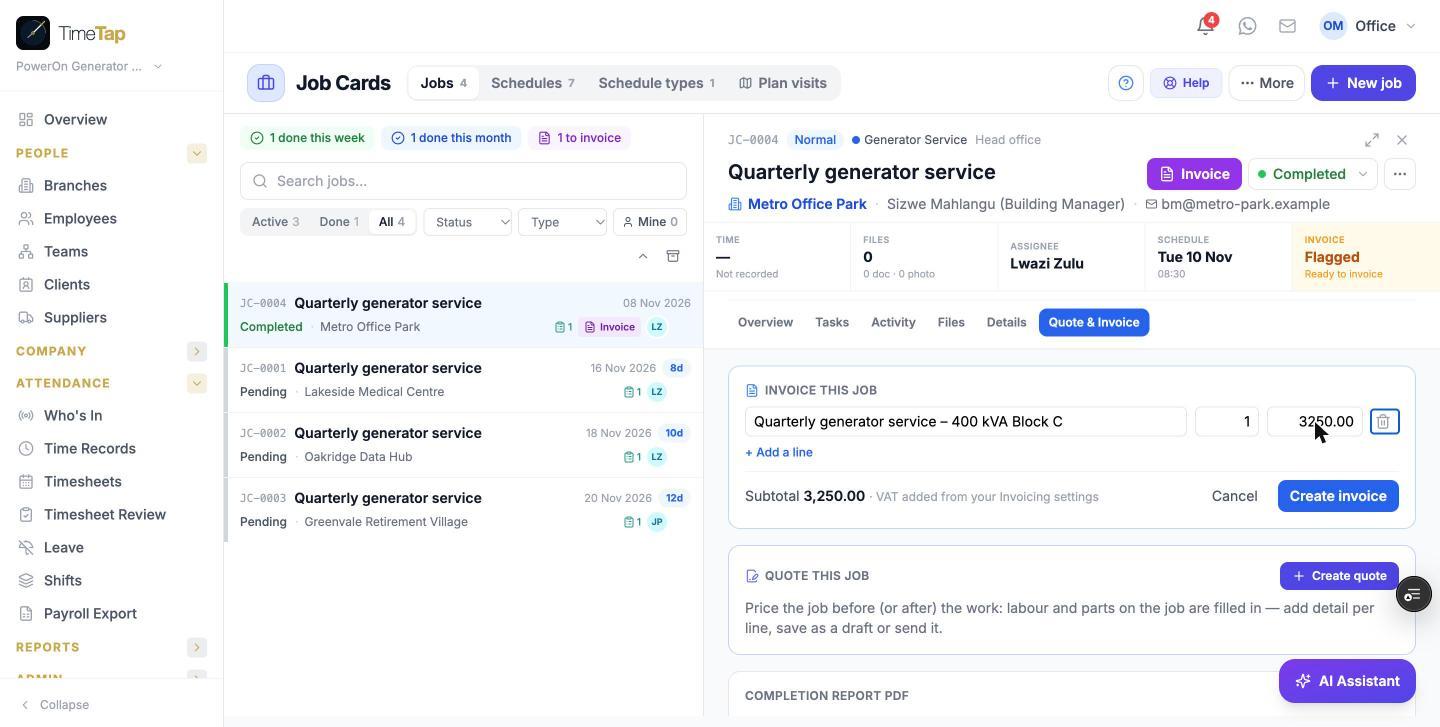
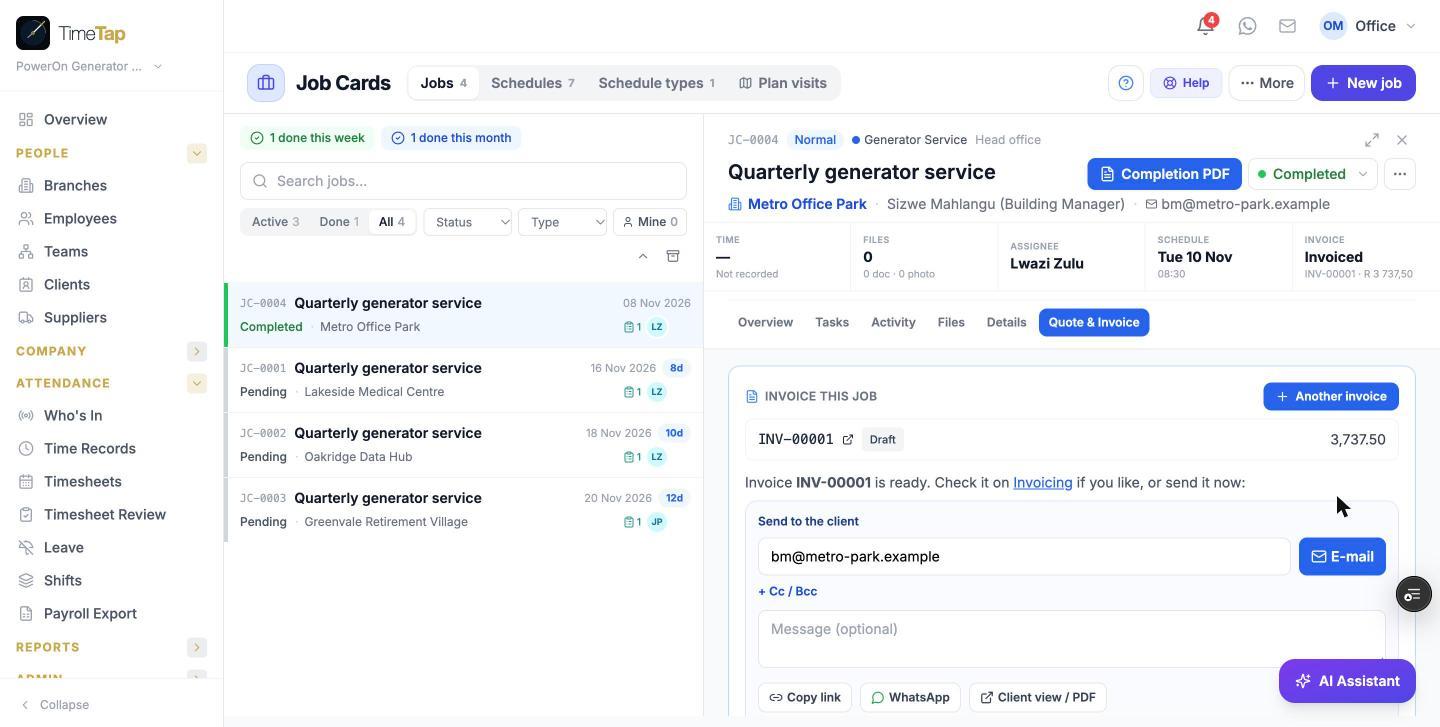
With the Invoicing & Quotes add-on, invoice straight from the completed job: TimeTap lists the labour, parts and costs marked to charge the client — add or change lines (e.g. Quarterly generator service – 400 kVA Block C), tap Create invoice, then send it by e-mail or WhatsApp. The job shows as Invoiced, so it can't be billed twice.

Invoice this job — check the lines and create the invoice
The invoice is ready to send to the client

STEP 8 · OFFICE

Every visit in the client's history

Where: Clients → the client → Checklists

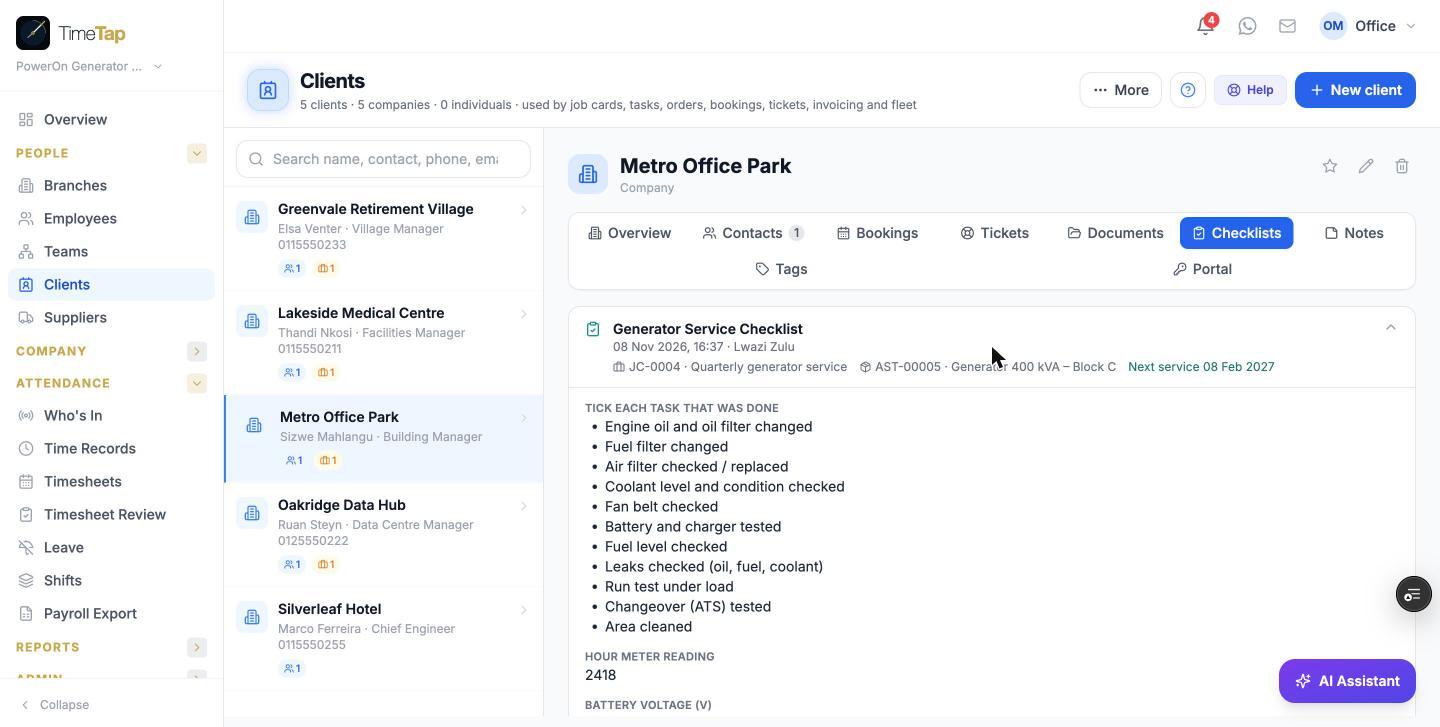
Every checklist done at a client is kept under Checklists — the answers, photos, the job, the certificate and the next service date. Ideal for audits, insurers and contract renewals.

Clients → Checklists: the full service history with every answer

Set up once

  • Schedule type — e.g. Quarterly generator service (every 3 months, 14 days notice).
  • Job type with the Generator Service Checklist and the Generator Service Certificate.
  • Certificate — letterhead, footer and signature.
  • Clients with a cellphone number for the contact person.
  • Technicians signed in to the staff app with notifications on.

What the generator checklist covers

Engine oil and oil filterFuel filterAir filterCoolant level and conditionFan beltBattery and chargerFuel levelLeak checkRun test under loadChangeover (ATS) testHour meter readingBattery voltage (V)Photos of hour meter and panelResult: ready for standby / follow-up

You edit the checklist yourself — add readings, photos or questions for your own procedures.

Questions

Can we service some generators monthly and others quarterly?+

Yes. Each generator is enrolled in a schedule type — monthly, every 2, 3 or 6 months, or yearly — with its own next due date.

Do technicians record hour meter readings?+

Yes. The service checklist has number fields for the hour meter and battery voltage, plus photos — so every visit's readings are kept and comparable.

What if the client wants another day?+

The client answers the WhatsApp confirmation with 'another day'. The job card shows it, you pick a new day and ask again — then commit the job.

How does the client get the service certificate?+

When the job is completed, TimeTap creates the certificate with your letterhead and signature, the date serviced and the next service date, and sends it by e-mail and WhatsApp. If you prefer to be paid first, the certificate can wait until the job's invoice is paid.

Can we invoice from the job?+

Yes, with the Invoicing & Quotes add-on. The invoice is created from the job's lines, sent from the job card and linked to it so it can't be billed twice.

The TimeTap features behind it

Also see: Transformer maintenance

Try it with your own generators

Set up in minutes. 14 days free, no credit card.

Start free trial